



SkooveLearn PianoDownload on the App Store
Install Now


How to play piano: 5 simple steps for beginners


Want to learn how to play piano but don’t know where to start? This simple guide will walk you through everything you need, from your first notes to playing real songs. No experience needed, just follow the steps and you’ll be playing music sooner than you think.

Learn to read piano notes: a free mini-course

Reading notes is the skill that connects all five steps above. These 22 short lessons take you from your very first key to reading both clefs. Work through them in order, or tap “Open lesson” on any topic. Each takes just a few minutes.

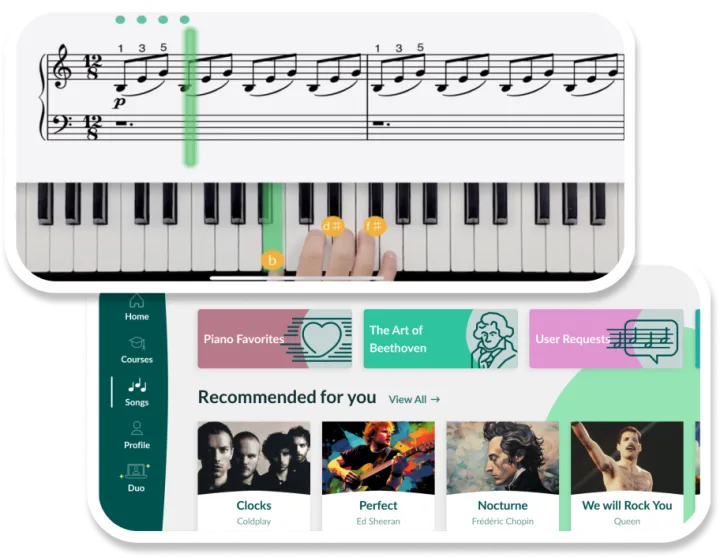
Practice every lesson at the piano with SkooveInteractive lessons that listen while you play and give you instant feedback. Try it free for 7 days.

Note reading basics: keys and note names · 6 lessons

The musical alphabet

Just seven letter names cover every white key.

Open lesson +

Piano notes use only seven letter names: A, B, C, D, E, F and G. After G, the pattern simply starts again at A, and it keeps repeating from the lowest key to the highest.

Across one octave you’ll find 12 keys. Seven white keys carry those letter names, and the five black keys between them borrow their names from sharps and flats.

Next up: Finding C and F on the keyboard

Finding C and F on the keyboard

The black key groups are your map.

Open lesson +

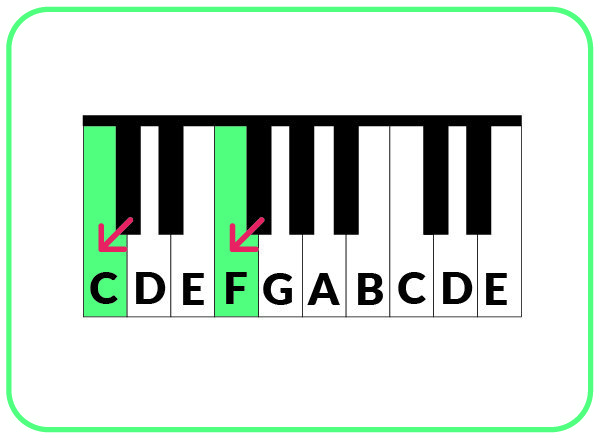
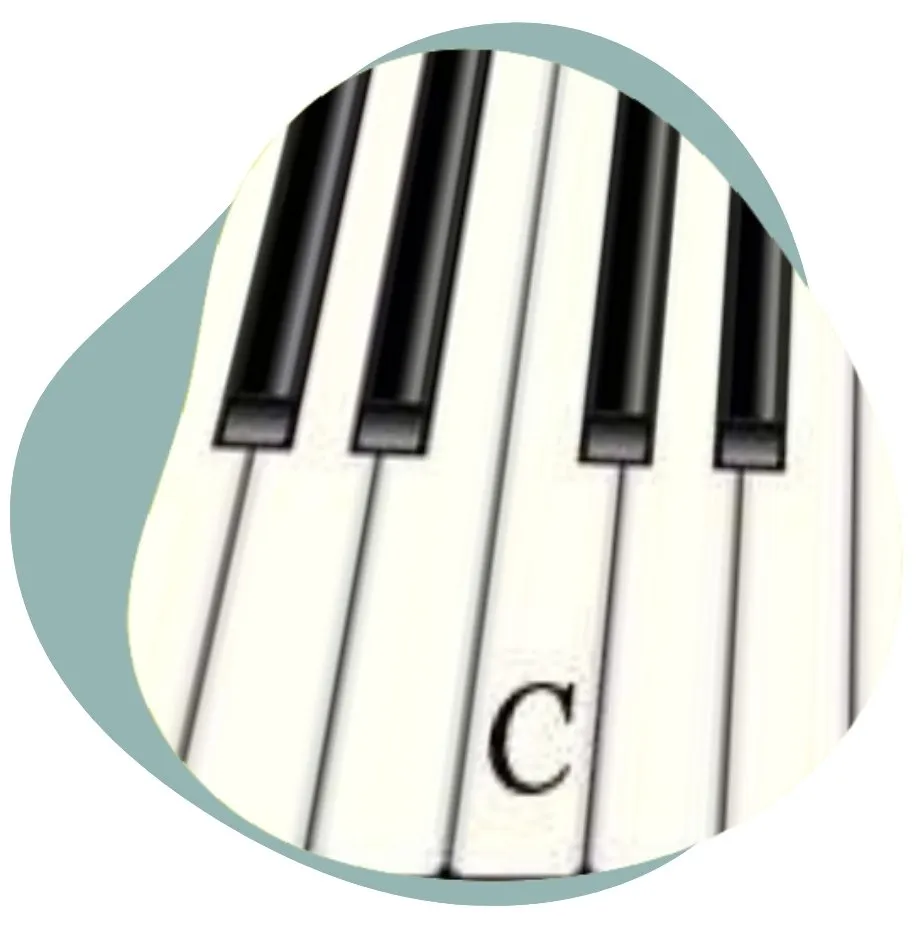
How to find C and F using the groups of black keys

The black keys come in alternating groups of two and three, and those groups tell you exactly where you are.

• Find any pair of black keys: the white key just to its left is C. • Find any group of three black keys: the white key just to its left is F.

From there it’s just counting: D and E follow C, while G, A and B follow F.

Next up: Octaves and note numbers

Octaves and note numbers

Why the pattern repeats, and what C4 means.

Open lesson +

One octave from C to C on the piano keyboard

Play a C, count up eight white keys, and you land on another C. That distance is an octave, and the same eight-note pattern repeats across the whole keyboard: lower to the left, higher to the right.

To tell the Cs apart, each one gets a number. The C near the middle of the piano is C4, the next one up is C5 and the next one down is C3. You’ll see these numbers in apps and tutorials, including Skoove.

Next up: Middle C

Middle C

Your first landmark on the keyboard and the staff.

Open lesson +

Most beginners start with middle C, and for good reason. It sits near the center of the keyboard, often right under the maker’s logo, and it connects the two halves of piano music. That central position makes it the point you’ll measure every other note from.

Middle C on the piano keyboard and on the grand staff: one ledger line below the treble clef and one ledger line above the bass clef

1How do I find it on the keyboard? +
Look for the pair of black keys closest to the middle of the piano. Middle C is the white key immediately to its left.
2Where is it in the treble clef? +
On a short extra line just below the treble staff. Your right thumb usually plays it.
3Where is it in the bass clef? +
On a short extra line just above the bass staff. It’s the same key, written for the left hand.

Next up: Sharps and flats

Sharps and flats (black keys)

How the black keys get their names.

Open lesson +

Unlike the white keys, the black keys don’t get letters of their own. Each one takes its name from a neighboring white key, using a sharp or a flat:

• Sharp (♯) raises a note by a half step, to the key immediately on the right. G♯ is just right of G. • Flat (♭) lowers a note by a half step, to the key immediately on the left. E♭ is just left of E. • Natural (♮) cancels a sharp or flat and brings you back to the plain note.

Sharps and flats shown on the black keys of the piano

Because every black key sits between two white keys, it has two possible names. The key between C and D is C♯ if you count up from C, or D♭ if you count down from D. Two names for the same key are called enharmonic equivalents.

Next up: Half steps and whole steps

Half steps and whole steps

The smallest moves on the keyboard.

Open lesson +

A half step is the smallest distance on the piano: from one key to the key right next to it, white or black. Two half steps together make a whole step.

Two pairs of white keys have no black key between them, E–F and B–C, so moving between them is already a half step.

Next up: The staff and clefs

Reading music on the staff · 5 lessons

The staff and clefs

Where written notes live, and how to decode them.

Open lesson +

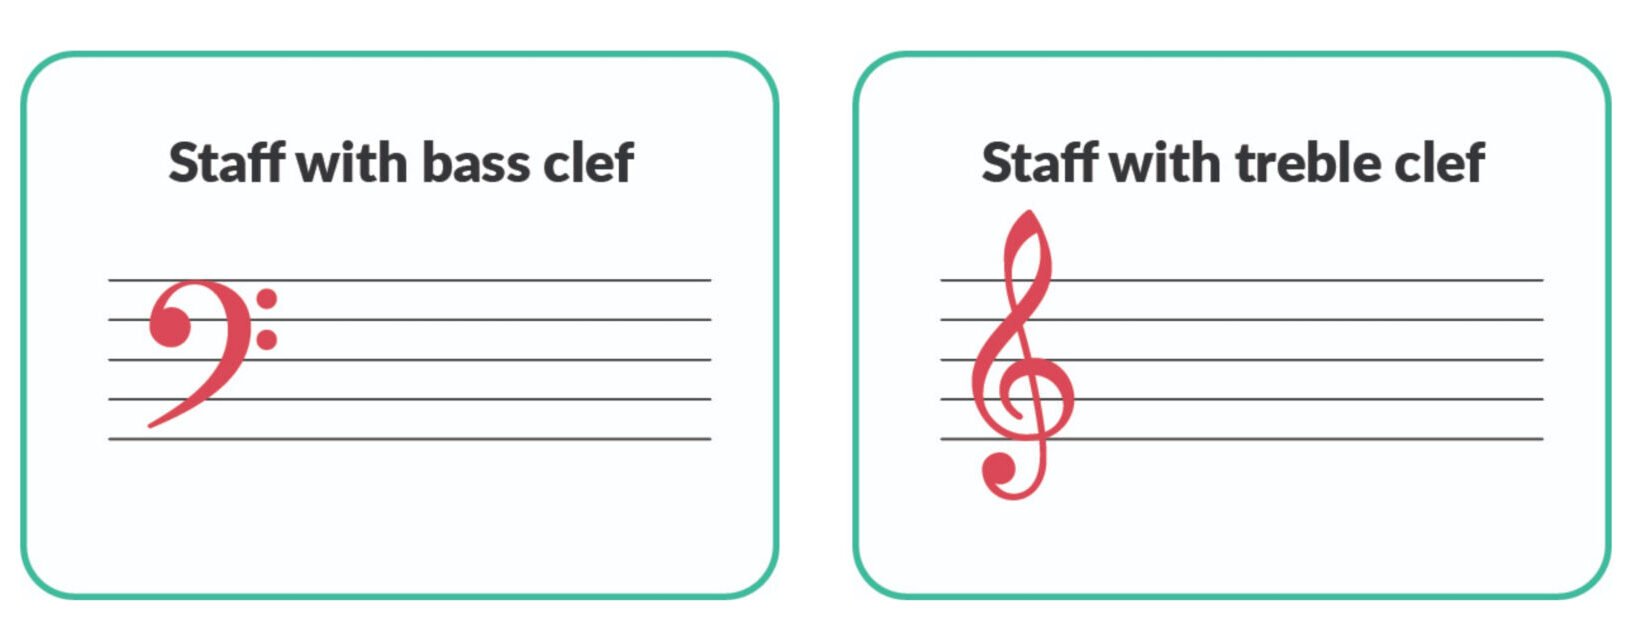
Written music sits on a staff: five lines and the four spaces between them. Each line and space stands for a note, and the clef at the start tells you which note is which.

In piano music you’ll nearly always see two clefs stacked together: the treble clef on top, mostly for the right hand, and the bass clef below, mostly for the left.

Treble clef and bass clef on the staff

Next up: Treble clef notes

Treble clef notes

The upper staff, mostly for your right hand.

Open lesson +

Count from the bottom line upward.

Lines: E, G, B, D, F. A classic way to remember them is “Every Good Boy Does Fine.”

Notes on the lines of the treble clef

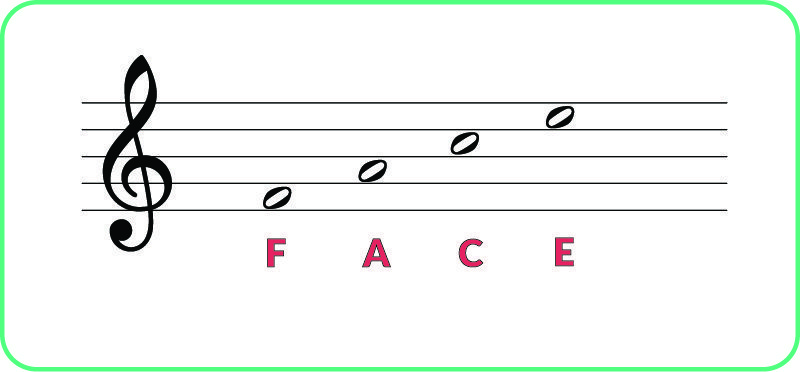
Spaces: F, A, C, E, which conveniently spell the word FACE.

Notes in the spaces of the treble clef

Next up: Bass clef notes

Bass clef notes

The lower staff, mostly for your left hand.

Open lesson +

Again, count from the bottom line upward.

Lines: G, B, D, F, A. Try “Good Boys Deserve Food Always.”

Notes on the lines of the bass clef

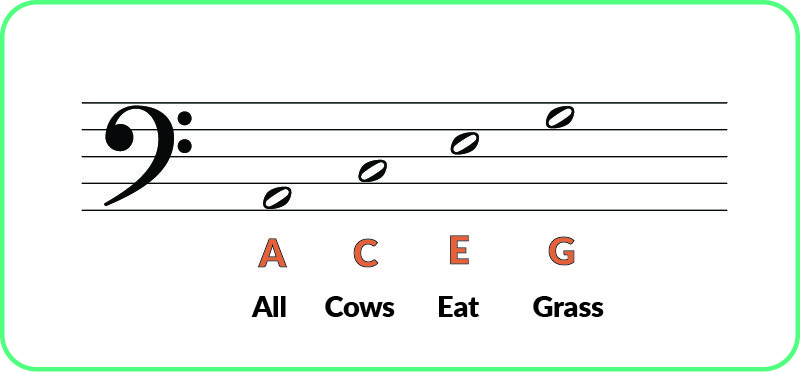
Spaces: A, C, E, G, or “All Cows Eat Grass.”

Notes in the spaces of the bass clef

Next up: The grand staff

The grand staff

Both staves together, the way piano music is written.

Open lesson +

Put a treble staff above a bass staff, join them with a curly brace, and you have the grand staff, the standard layout for piano music.

Middle C sits between the two. Higher notes climb into the treble staff and are usually played by the right hand; lower notes move down into the bass staff for the left hand.

Next up: Ledger lines

Ledger lines

Notes that sit above or below the staff.

Open lesson +

When a note is higher or lower than the staff can hold, it gets its own short extra line, called a ledger line. Middle C is the one you’ll meet most: it sits on a ledger line just below the treble staff and just above the bass staff.

To read any ledger note, keep counting the alphabet past the edge of the staff, line then space then line. Beginner music rarely goes further than two ledger lines.

Ledger line notes above and below the treble and bass clef staves

Quick check: ledger line notes

Count on from the closest staff line, then tap the card.

Ledger line note quiz card, treble clefTap to reveal

A

On the first extra line above the treble staff.

Ledger line note quiz card, treble clefTap to reveal

A

On the second extra line below the treble staff.

Ledger line note quiz card, bass clefTap to reveal

C

On the second extra line below the bass staff.

Ledger line note quiz card, treble clefTap to reveal

C

On the second extra line above the treble staff.

Ledger line note quiz card, bass clefTap to reveal

E

On the second extra line above the bass staff.

Ledger line note quiz card, bass clefTap to reveal

E

On the first extra line below the bass staff.

Next up: Landmark notes

Making the notes stick · 5 lessons

Landmark notes

A few fixed points that make every other note quick to find.

Open lesson +

Memorizing every note one by one is slow. It’s faster to learn a handful of fixed reference points and find everything else from them. Five work especially well: middle C, treble G (the line the treble clef curls around), bass F (the line between the bass clef’s two dots), and the Cs an octave above and below middle C, treble C and bass C.

Five landmark notes on the grand staff and the piano keyboard

Quick check: start from a landmark

Spot the closest landmark, move one step, then tap the card.

Landmark note quiz cardTap to reveal

A

A step up from treble G.

Landmark note quiz cardTap to reveal

F

A step down from treble G.

Landmark note quiz cardTap to reveal

B

A step down from treble C.

Landmark note quiz cardTap to reveal

D

A step up from treble C.

Landmark note quiz cardTap to reveal

G

A step up from bass F.

Landmark note quiz cardTap to reveal

D

A step up from bass C.

Next up: Steps and skips

Steps and skips

Follow how the notes move instead of naming each one.

Open lesson +

Once you know a few landmarks, you can read the rest by how the notes move. From a line to the space right beside it, or a space to the next line, is a step: one letter up or down. From line to line, or space to space, is a skip: you pass over one letter.

A step from E to F and a skip from E to G on the treble staff

Quick check: step or skip?

Watch how the second note moves, then tap the card.

Step or skip quiz cardTap to reveal

Step

G up to A, line to space.

Step or skip quiz cardTap to reveal

Skip

E up to G, line to line.

Step or skip quiz cardTap to reveal

Step

B up to C, line to space.

Step or skip quiz cardTap to reveal

Skip

F up to A, line to line.

Step or skip quiz cardTap to reveal

Skip

C up to E, space to space.

Step or skip quiz cardTap to reveal

Step

D down to C, line to space.

Next up: Mnemonics

Mnemonics

Useful at first, but not a long-term reading method.

Open lesson +

Memory phrases like Every Good Boy Does Fine help a lot in your first days. The catch is that some learners keep reciting the whole sentence to find one note, which slows reading down. Treat them as a safety net: check a note with the phrase, then try to recognize it directly next time.

Memory phrases

Most helpful: your first week

✓ Tell you which letter goes where

✓ Good for double-checking

✓ Slow if you say the whole phrase each time

Landmark notes

Most helpful: reading at speed

✓ You recognize notes by position

✓ Pair naturally with steps and skips

✓ Turn automatic with practice

Next up: Flashcard drill

Flashcard drill

Four stages, from slow and easy to three seconds a card.

Open lesson +

Flashcards work best in stages. Only move on when the stage you’re on feels easy, and check every answer so you don’t accidentally learn a mistake.

1In order, answers showing +
Lay out cards from middle C up to G with the note names visible. Play each note as you say it.
2Mixed up +
Shuffle the same cards. Music rarely moves in alphabetical order, so this is where real reading begins.
3Answers hidden +
Name each note before turning the card over. Say it, play it, then check.
4Beat the clock +
Give yourself three seconds per card and answer before time runs out, even if you have to guess. The time limit trains you to see a note instead of counting to it.

Next up: Name notes in real songs

Name notes in real songs

The quickest way to make notes stick.

Open lesson +

Notes stick faster when you use them. Choose a simple melody that plays one note at a time, keep your hand in one position, and say each note name as you play. Twinkle, Twinkle, Little Star is a great first choice because it moves mostly by step close to middle C, and the same small group of notes turns up in most easy beginner songs.

Getting feedback while you play speeds everything up. Skoove’s interactive piano lessons listen to every note and tell you straight away whether it was right.

FOCUS ON THE FEW NOTES THAT MATTER

Beginner pieces stay close to middle C most of the time. Get comfortable with about an octave on either side first, and you’ll be able to read most beginner music well before you know the whole keyboard.

Next up: Your 4-week routine

Your practice plan · 3 lessons

Your 4-week routine

Ten minutes a day with one clear goal per week.

Open lesson +

Little and often works better than long, occasional sessions. Tap a week to see what to practice each day.

1Week 1: Find your way around +

● 3 min: find every C on the keyboard, then every F

● 4 min: play C up to G with your right hand, saying each note

● 3 min: play C down to F with your left hand

Ready to move on when: you can find any C or F in a second or two.

2Week 2: Treble notes from middle C to G +

● 3 min: flashcards in order

● 4 min: mixed-up flashcards, playing each note

● 3 min: a simple tune, naming the notes aloud

Ready to move on when: you can name C, D, E, F and G at a glance.

3Week 3: Bass notes from F to middle C +

● 3 min: bass clef flashcards in order

● 4 min: mix bass and treble cards together

● 3 min: find each note from its closest landmark

Ready to move on when: you can switch between clefs without starting from the bottom line.

4Week 4: Speed and ledger lines +

● 3 min: timed flashcards, three seconds each

● 4 min: add the ledger line notes

● 3 min: sight-read a new, simple melody

Ready to move on when: you can name most notes within three seconds.

Most beginners feel comfortable naming notes after a few weeks like this. Reading fluently takes a few months, and that’s perfectly normal.

Next up: Common mistakes

Common mistakes

What slows beginners down, and what to do instead.

Open lesson +
1Counting up from the bottom line every time +

Try this instead: Learn the landmark notes and start from whichever one is closest.

2Relying on note stickers for too long +

Try this instead: Labeling piano keys is a great help for the first few weeks. After that, peel the stickers off so your eyes stay on the music.

3Practicing only the treble clef +

Try this instead: Give the bass clef the same attention from the start, and mix cards from both clefs in every session.

4Never leaving middle C position +

Try this instead: When it starts to feel easy, move your hands to a new spot, such as G position.

5Skipping the answer check +

Try this instead: Confirm every answer as you go, or practice with an app that listens and checks for you.

Next up: Check your progress

Check your progress

A quick way to see if you’re ready for real songs.

Open lesson +

Go back through the quick checks in the lessons above: ledger line notes, landmark notes, and step or skip. If you can answer most of them without counting up from the bottom line, you’re ready to start on real songs.

Want a bigger challenge? Pick a simple song you’ve never played and try to name every note before you play it.

What to learn next · 3 lessons

Key signatures

The sharps or flats written at the start of each line.

Open lesson +

Instead of writing a sharp or flat next to every note, music often collects them in a key signature, placed right after the clef. The order never changes:

Sharps: F♯, C♯, G♯, D♯, A♯, E♯, B♯, remembered as “Father Charles Goes Down And Ends Battle” Flats: B♭, E♭, A♭, D♭, G♭, C♭, F♭, the same phrase backwards: “Battle Ends And Down Goes Charles’ Father”

Sharps and flats in a key signature

Key signatures become important once you read a whole piece of sheet music, because one sharp or flat at the start of the line affects that note every time it appears.

Rhythm and note values

How long each note lasts.

Open lesson +

Naming notes tells you what to play; rhythm tells you when. Rhythm and note values show how long each note lasts, while time signatures show how the beats are grouped into bars.

To make a note last longer, music uses dotted notes and ties.

Dynamics

How loud or soft to play.

Open lesson +

Dynamics are the markings that tell you how loudly to play, from pp for very soft to ff for very loud. You’ll usually find them just under the staff.

Once notes, rhythm and dynamics all feel familiar, sight reading is the natural next goal: playing a piece you’ve never seen before, at a steady pace, without stopping.

Get familiar with the piano

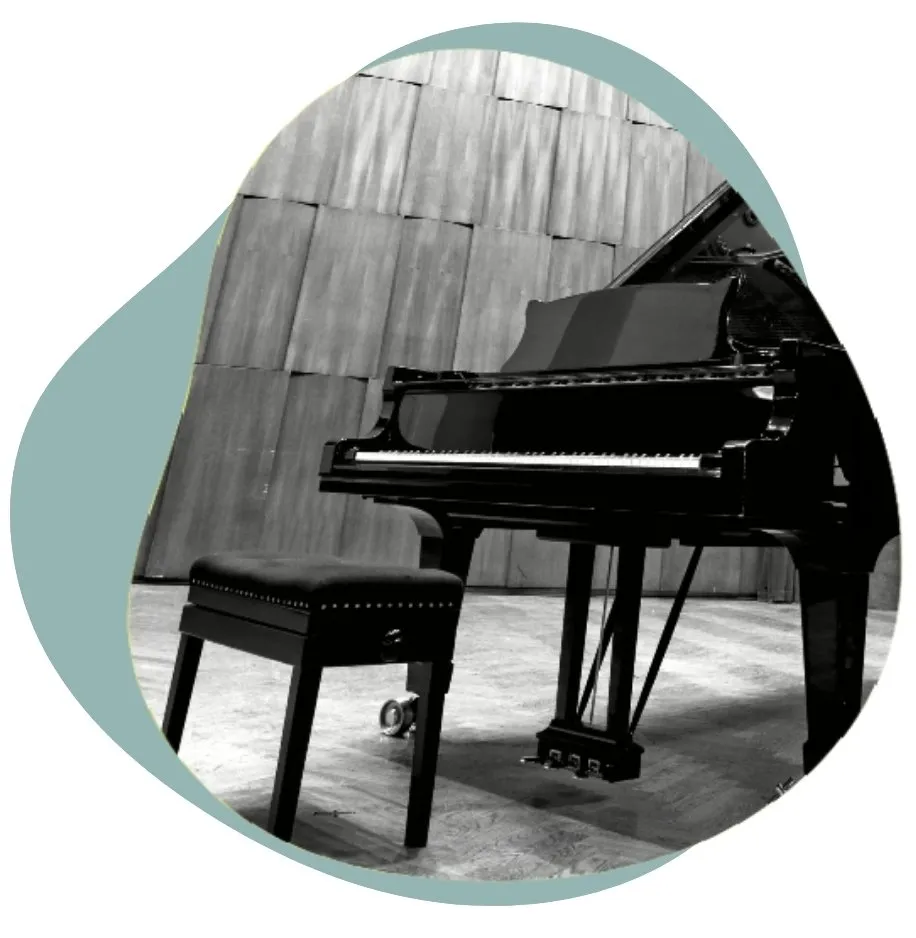
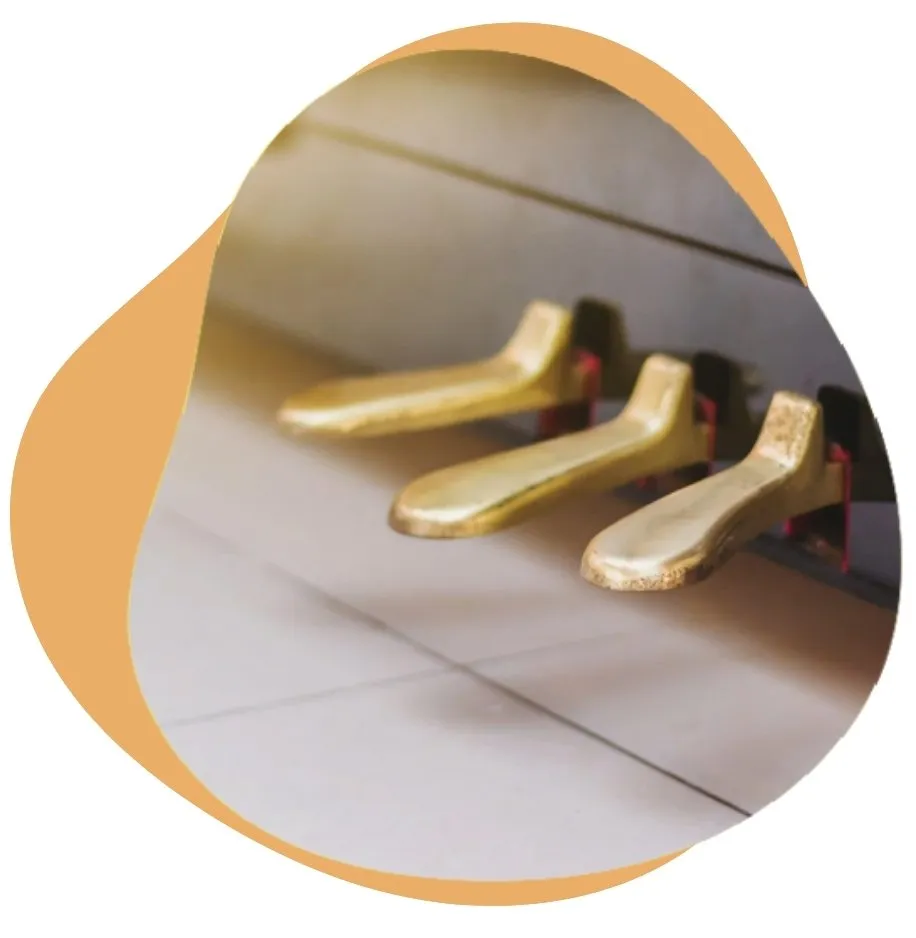
Getting started with the piano begins with getting to know your instrument. Take a second to notice where the keys are, how the pedals feel under your feet and where Middle C is at the centre of the keyboard. You can try out different types of pianos to find the one that feels right for you and your piano goals. These early stages are all about building comfort and connection with the instrument. This will make sure you feel at home with the piano before you play your very first notes and songs. 

If you’re interested in beginning your piano journey these articles are a perfect place to start.

choose piano

Choosing a piano

Discover what type of piano or keyboard is right for you and your space.

piano keys

Piano keys

Learn how piano keys are arranged and how to find your way around the keyboard.

middle c

Middle C on piano

Discover Middle C and learn why it’s a key starting point for beginners.

piano pedals

Piano pedals

Understand what each pedal does and how it changes the sound of your playing.

Piano posture and technique

How you sit and move at the piano can make a big difference to your playing. Making sure you have good posture and technique will help you play with ease and avoid tension and soreness. We will take a look at how to sit at the piano, position your hands with proper posture and technique. This will allow you to move in a more relaxed and natural way. These small habits can make a big difference to your playing and will create positive habits that you can take throughout your piano journey. 

Following these articles is the best way to make sure you’re playing with proper posture and technique. 

piano posture

Piano posture and technique

Learn how to sit comfortably at the piano to play with ease and avoid strain.

Understanding music theory

Music theory is the language behind music. By getting to grips with a few basics, you’ll learn concepts that help you understand how notes, chords and rhythms work together to create music. Music theory isn’t just about rules you need to follow, it’s about making sense of the sounds you hear and songs you love to play. A little bit of theory knowledge goes a long way and will allow you to understand what you’re doing on the piano and move forward with confidence and maybe even write some music of your own. 

We have lots of articles to guide you through this interesting topic, have fun exploring them as you feel more comfortable with the piano.

Piano notes

Get to know the names of the notes and how they’re laid out on the keyboard.

read sheet music

Sheet music

Learn to read notes, rhythms and symbols on the staff.

piano chords

Piano chords

Discover how chords work and how to play the ones you’ll use in real songs.

piano scales

Piano scales

Understand simple scales and patterns that build coordination and finger strength.

music symbols

Music symbols & rests

Get to know the common signs and markings you’ll see in sheet music.

Developing your listening skills

Ear training and sight reading aren’t required to start, but they’re powerful tools that make learning easier and help you play with more freedom. When developing your musical ear and sight reading a little goes a long way. With some basic understanding of what you’re hearing these skills help you recognize notes by sound, read music faster and feel more confident. As you grow, like leveling up your piano abilities over time you can understand what you’re doing and improve much faster, especially with the help of Skoove’s interactive lessons which will guide your beginners ear to masterful piano playing.

If you don’t know where to start these articles provide a great jumping on point for both ear training and sight reading.

ear training

Ear training exercises

Learn to recognize notes and chords by ear so you can play and learn without sheet music.

sight reading

Sight reading

Practice reading and playing music at first glance.

Play your first songs

Now that we have gotten to grips with the basics of piano playing it’s time to apply what you’ve learned so far and have fun with some real music. You’ve made a start with the basics, built new skills and now it’s time to put it all into practice. Beginning with some easy piano songs is a great way to bring all your newfound knowledge together. These simple tunes will help you build confidence, apply your piano skills and enjoy the fun of actually making music. 

With this hand picked easy piano songs article finding new pieces to play couldn’t be easier. Let’s start making real music with Skoove!

easy piano songs

Easy piano songs

Start with simple, fun songs to build confidence and see real progress.

Quiz: test your piano basics

Ten quick questions on the keyboard, the staff and reading notes. Pick an answer: it turns green if you’re right and red if not. Use Back to review earlier questions, and see your score at the end.

0 correct

Question 1 of 10

What is the name of the highlighted key?

Piano keyboard with one white key highlighted
Start your piano journey now!
  • Fall in love with the music - Learn your favorite songs; whether they're classical, pop, jazz or film music, all at a level that suits you.
  • Enjoy interactive piano lessons - Learn with courses that help you master everything from theory, chords, technique, and more
  • Get real-time feedback - Improve your practice with rich feedback as Skoove listens to your playing and highlights what went well and areas for improvement
Start my piano journey now!
7 day free trial
$9.99 / month after the free trial, billed annually at $119.99
Start your musical journey